
Setup/First Steps
We'll be using the Particle Photon microcontroller. Similar to the classic Arduino, it has the following key features/differences:
- Built-in WiFi that connects to an Internet server (consequently, requires Internet access)
- Ease of connectivity to online services such as IFTTT and Blynk
- Much smaller footprint compared to the classic UNO R3
- 3.3V logic instead of the UNO R3's 5V
- More memory for writing complex code and interactions
- Web browser programming environment, but code language is ‘Arduino-like’ (i.e. C)
- Capable of wireless, ‘over-the-air’ (OTA) firmware updates
Start here
A Photon is typically set up (‘claimed’) via the Particle smartphone app – which offers the most convenient way to get started. This is also the recommended method to claim your Photon, as detailed in the official Particle.io documentation.
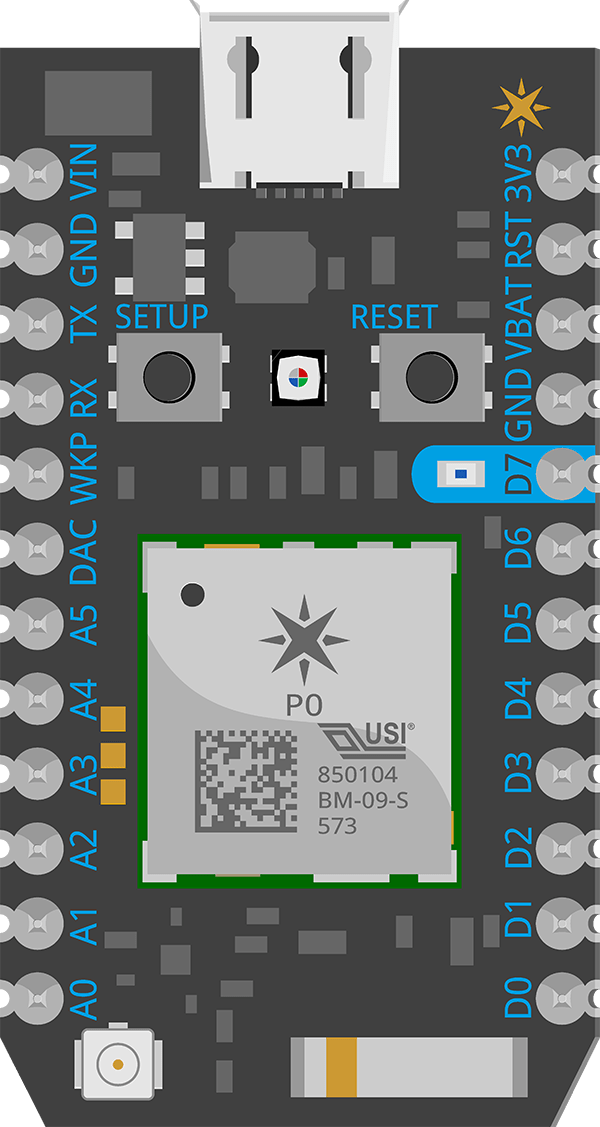
1. Know what the colour codes mean
The Photon relies on a tiny RGB LED to broadcast its connection status. Refer to this page for a description of what the colour codes are. It helps to know these colour and flashing ‘codes’ to know what is going on with your Photon's status.
2. Power up via USB
Plug in your Photon using a micro USB cable to your computer. If this the the very first time you're doing so, it should power up and start blinking a deep blue. This is also known as the Listening Mode.
Windows users: you may need to install the Particle drivers on your system. Follow instructions on this Particle Documentation page and continue from here after you have the drivers set up.
3. Serial port connection
We'll use Coolterm to connect to the Photon via USB. Any other Serial communication software should also work. Launch the application and click on the Options tool button to get this dialog box:
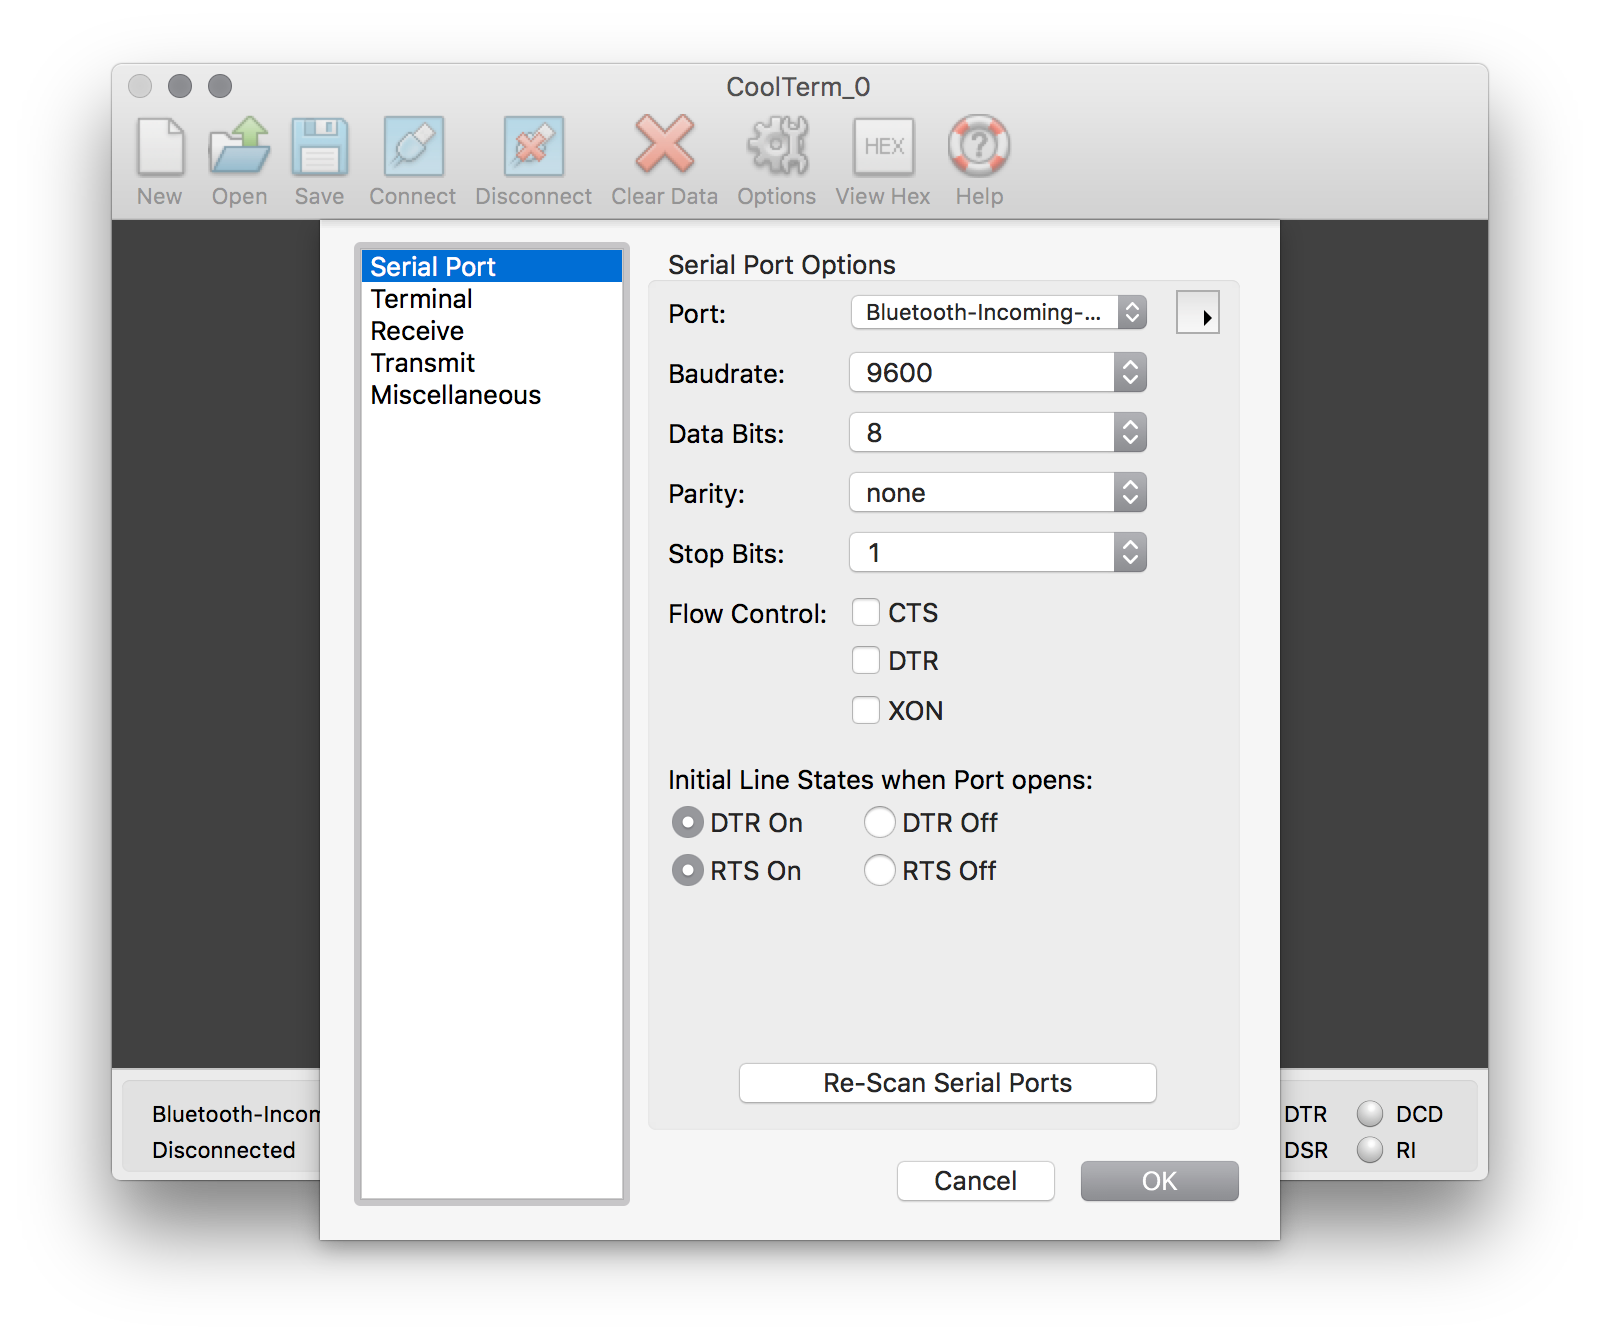
Under the Port dropdown box, select the appropriate port that shows up when the Photon is connected:
For PCs: usually COM1, COM2, COM3…
For Macs: usually usbmodemXXXXXX (where XXXXXX = a unique combination of characters/numbers)
If you're not sure which port it is, disconnect the Photon and click Re-Scan Serial Ports. The port that disappeared from the list will be the port you want to connect to. Without quitting Coolterm, connect the Photon again and retry this step (be sure to click Re-Scan Serial Ports again to refresh the list).
4. Getting the Device ID
Click the Connect button on the toolbar. Nothing should happen in the main Coolterm window. Now, press the ‘i’ key on your keyboard. You should get the following message:

Select the Device ID and copy+paste it to a text editor – we'll need to use it later for the claiming process.
5. About the Photon's WiFi
We are using a standalone, separate WiFi network that is set up in our studio space. Its SSID and password will be shared in class.
You can add up to 5 sets of WiFi credentials to the Photon by repeating steps 4 & 6. In fact, you should repeat these steps to add team members’ mobile phone WiFi hotspot credentials. This will help you when you are out in the field doing mobile data harvesting/connectivity, for example. More on this can be found at the bottom of this page.
6. Configure the Photon's WiFi
Check that the Coolterm-Photon connection is still open. Within the Coolterm window, press the ‘w’ key on the keyboard. Follow the instructions on-screen to enter a WiFi credential. If you make a typo, the backspace key does not work; you'll have to press the Reset button on the Photon, and restart from step 3 again. You have to hit the ‘return’ key after each line is entered. Use the following settings:
SSID: the hotspot's name
Security: 3 (WPA2)
Password: the hotspot's password
If you have everything done correctly, you should get the following response from your Photon in Coolterm:
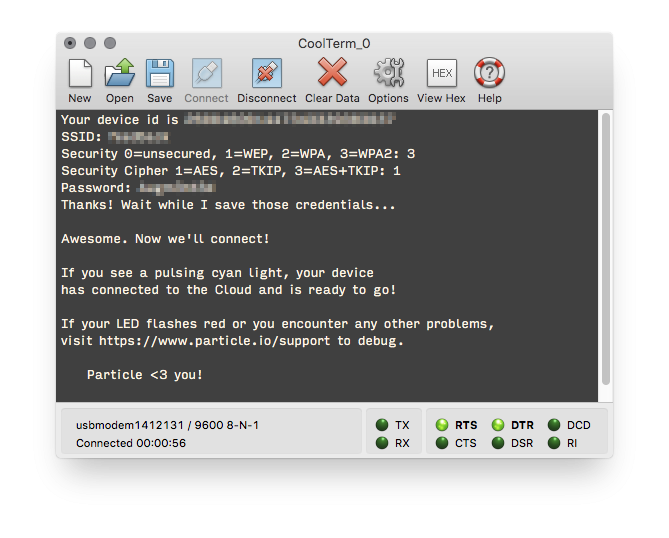
In a few short moments, your Photon's status LED should also transition from rapid blinking green, to blinking cyan, then eventually to a ‘breathing’ cyan colour. If this is the very first time you are setting up the Photon (i.e. not having done the mobile app claiming), your Photon's status LED might remain stuck in a rapid blinking cyan pattern – this is normal, as we haven't claimed the device yet.
Typo? Made a mistake? Lost? Want to start over for any reason? Follow these steps:
- Press and release the RESET button on the Photon – the LED should turn white momentarily
- Wait for the Photon to restart – after a brief pause it should be blinking deep blue again. If it doesn't, press and hold the SETUP button for 3-4 seconds (until it starts blinking deep blue)
- In Coolterm, click on Disconnect, then Connect again
- Continue from Step 6.
7. Claim the Photon
Now we have to claim the Photon on the Particle server. Your Photon should now be blinking cyan non-stop. Make sure your laptop has its own internet connection (do NOT connect your laptop to the special WiFi network). Open up your browser and go to https://build.particle.io. If you have not created an account for yourself, do so now.
After signing in, in the bottom left corner of the Build interface, click on the Devices icon. A light sidebar should appear on the left, listing all Particle Devices you have claimed since opening your account – there should be none. Click on the yellow ADD NEW DEVICE button:
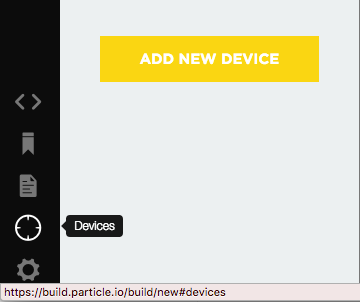
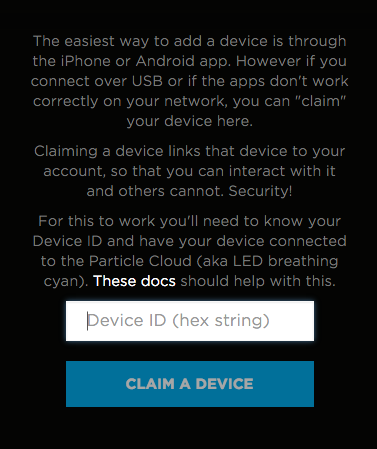
A dialog box should appear, asking you for your Device ID. Remember that Device ID that you copied from Coolterm in Step 4? Paste that here, and click on CLAIM A DEVICE:
You will next be prompted to name the device. Give it a unique and memorable name. You can rename your device at any point using the same Devices sidebar, so don't fuss over it.
Your Photon will now transition into a blinking cyan mode, and automatically reconnect to the Particle server again (breathing cyan).
During your very first setup, your Photon might be sent a system update from the server – when this happens, your Photon will be blinking magenta intermittently, and it might take a few minutes before it reconnects (blinking green, blinking cyan, breathing cyan). Patience is the key – do not cut off power when your Photons are blinking magenta!
The Photon will eventually settle and breathe cyan on it's status LED. When that happens, click on the Refresh icon at the top:

If all went well, you should now have a newly-claimed-and-named Photon device on the sidebar. There should also be a cyan breathing dot next to it on the screen, telling you that all is well and connected!
At this stage, you should be all set with a freshly-claimed Photon, ready for action! You are now ready to proceed to the Sensing Recipes or Expression Recipes sections and build your circuits.
8. Test your first circuit!
If you have a Photon Kit (that includes the breadboard, LDR and LEDs), head over to the official Particle Docs website to follow the first introductory tutorial to the Particle Photon:
https://docs.particle.io/guide/getting-started/examples/photon/
Additional Notes
The Photon has the ability to store up to 5 sets of WiFi credentials. By repeating steps 1, 2, 4 and 5, you can set additional WiFi networks that your Photon will attempt to connect to. This is useful for adding your home or teammates’ mobile hotspot credentials to. Adding a sixth set of credentials to your Photon will overwrite the oldest entry, etc.
It is unfortunately a complex process to have the Photon connect to enterprise-security WiFi hotspots that are found in most educational institutions. In other words, you will not be able to connect to the school WiFi network easily, if at all. This is also the reason why we have a standalone, private WiFi network for the class.
When flashing new firmware (i.e. code) to your Photon, especially if you're doing it for the very first time, the Photon might go into a system update state, represented by an intermittently flashing magenta status LED, for about 1-3 minutes. Sometimes it might restart itself and continue with the magenta flashing. Do not reset the Photon or disconnect power while the status LED is flashing magenta – you may temporarily brick your Photon which then involves a tedious recovery process. Just be patient and wait for the magenta flashing to complete.
A breathing magenta status, however, means that your Photon has gone into safe mode.