
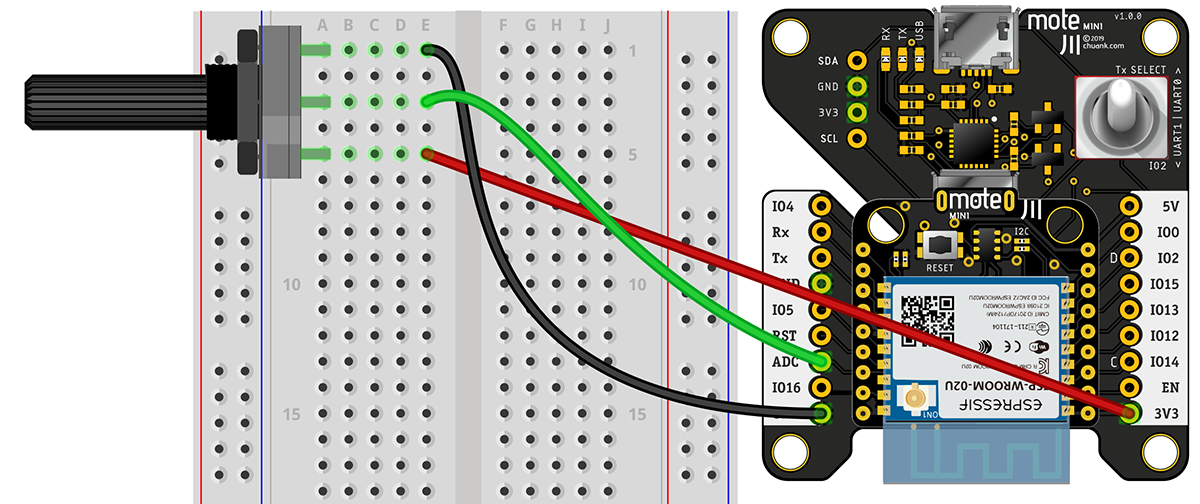
Basic Analogue Sensing
Analogue sensing relies on the mote's Analogue to Digital converter to translate a variable voltage swing between 0 and 3.3 Volts, to a 10-bit numerical range.
Like the Arduino, the ESP8266 in the mote mini has a 10-bit ADC. That means 0-3.3V gets mapped to 0-1024. Again, don't shoot the messenger, since theoretically 10 bits should return values from 0-1023 (1024 different values). It's been discussed and argued on github about the ESP8266 SDK's implementation of handling ADC conversions.
The mote mini has an built-in voltage divider to address an issue that is easily overlooked when performing analogue sensing on the ESP8266. The ESP8266's ADC pin can only accept 0-1V, anything beyond that will likely destroy the ADC on the chip. With the mote mini this is no longer an issue.
Sparkfun has a great primer to the voltage divider.
In this recipe, we are using a potentiometer, which is a variable resistor.
The key command to use analogue sensing is:
analogueRead(A0)
which returns a numerical range from 0-1024. Note the use of A0 – this is the ADC pin on the board, and the only pin that can do analogue voltage sensing.
By comparison the Arduino has 6 of these pins (it's actually multiplexed internally as there's only one ADC).
tl;dr: if you need more than one pin for analogue sensing on the mote, you will need to hook up an I2C ADC. This one from Adafruit is a great one given its 12-bit resolution and gain adjustments.
Libraries Used
- none
Code
|
|