
Servos
Servos are geared down motors with one important feature – they provide angular feedback which means you can tell it to turn to a specific angle (within 0-180º). This makes for very easy control of arm linkages, open/closing of doors/flaps, or creating metronome-like movement.
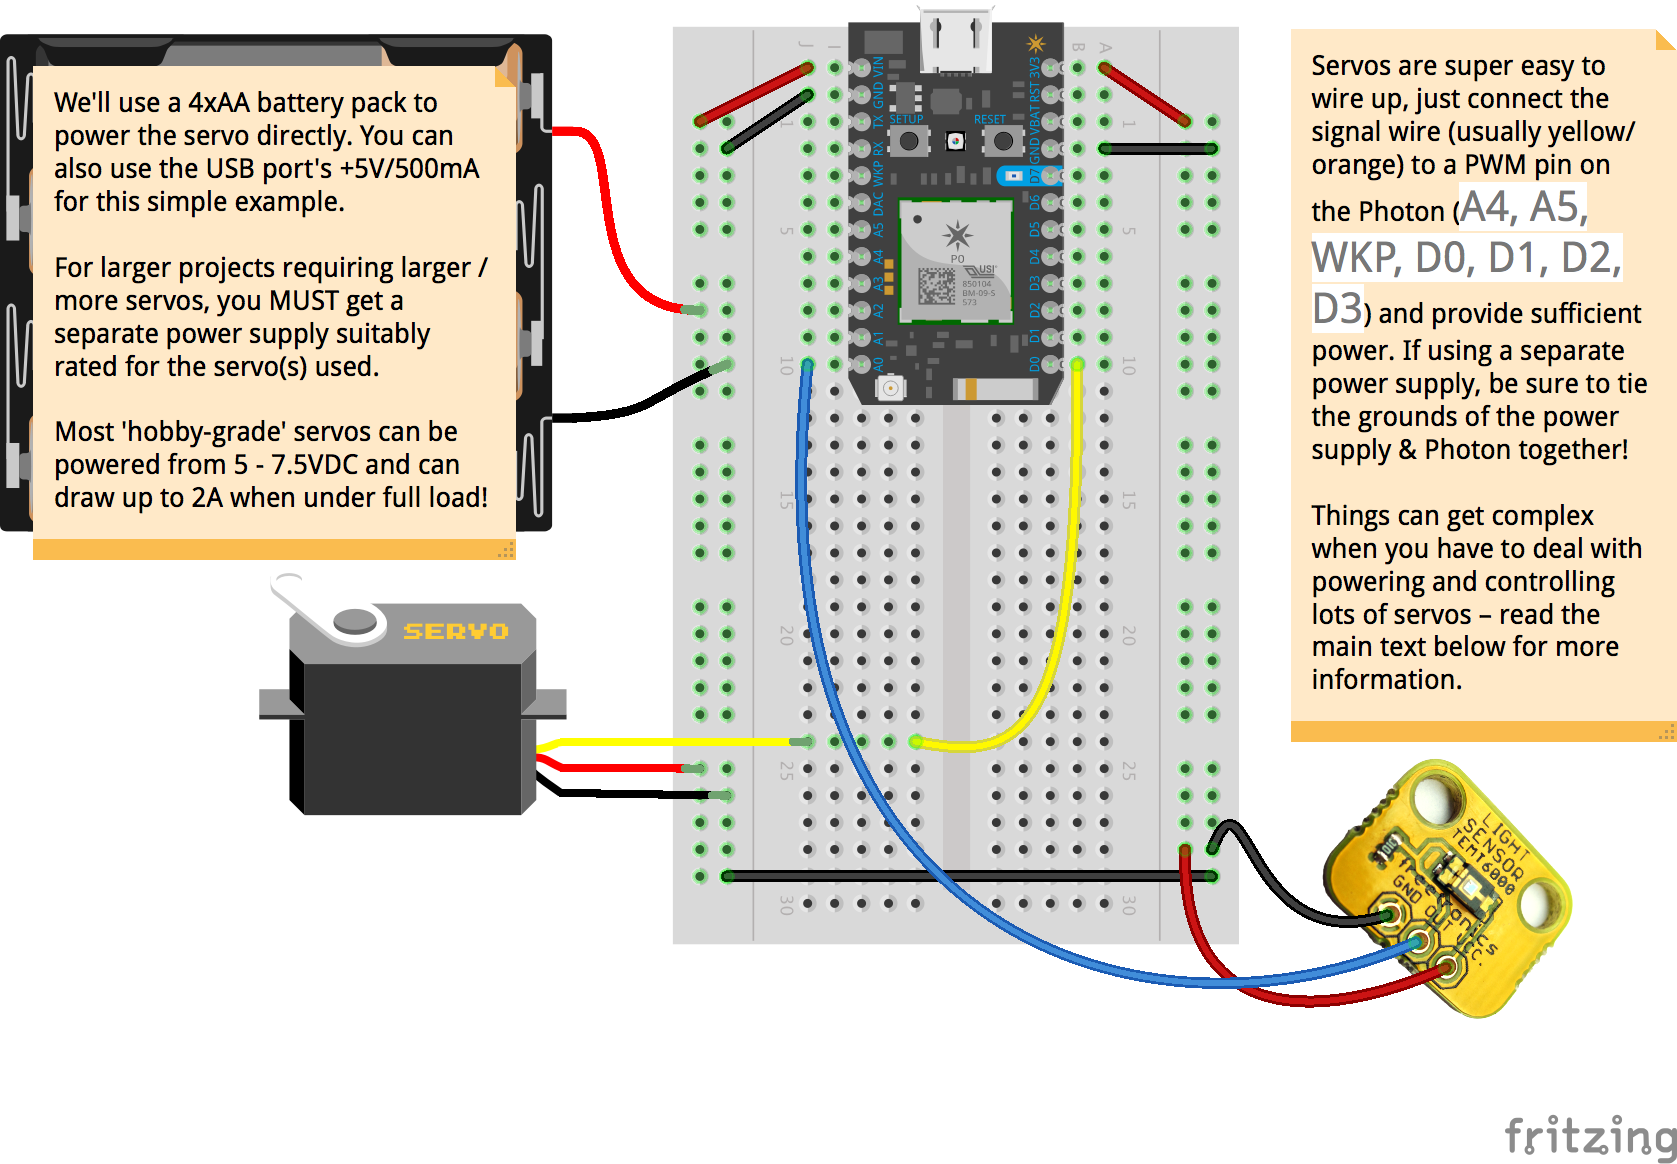
In this recipe, we will again use the light sensor in your basic kit as an example to drive the servo arm.
By now you should be confident with the idea that analogue sensors can be swapped about easily; with some tweaking of code you will be able to get the swapped sensor to work reasonably well before needing to write more complex code for very specific requirements.
Hobby servos have a limitation on their strength, i.e. torque in turning its arm. Despite it's internal gearing that gives it much more torque than a plain DC motor, you will reach the limits of what a hobby servo quickly. While you probably won't be able to get a single servo to open/close a door, a cheap servo designed with suitable mechanical leverage can easily serve as miniature robotic arms or articulated assemblies.
Fortunately, since you are only producing scale models of the interactive prototype, hobby servos should provide more than enough power. The only thing to be aware of is the amount of electrical power you need to feed to a large amount of servos – they add up very, very quickly.
Servos come in a wide variety of torque/speed ratings – the high-performance ones tend to creep up in price quite significantly. As with any component, check the datasheet for their operational ratings.
More on Servos:
Here's a nice video comparing the different types of ‘hobby’ servos out there. While this is presented from the perspective of remote-controlled flight hobbyists, it is still offers a useful introduction to this world of affordable servos:
https://learn.adafruit.com/adafruit-arduino-lesson-14-servo-motors/overview
A good place to check out a wide variety of hobby servos is ServoCity. Because it's based in the US I don't suggest ordering due to the long shipping times, but their website provides plenty of information on various different types of servos: https://www.servocity.com/servos/hitec-servos
Libraries Used
(learn how to import them in the Build IDE):
- none
Code
|
|